
Kids Mode
This will turn off kids mode. Are you age 13 or older?
Toddler Crafts
on August 1, 2019Simple. Simple. Simple. Young children need simple crafts that are fun to touch and explore. More pre-prep needs to take place so the children are left with decorating, attaching stickers, and gluing. This hands-on fun time helps kids really connect with what they’re learning.
As with all other items used with the toddlers and young preschoolers, watch carefully that items are not choking hazards and that all items are nontoxic. Use chunky crayons. Remember to put names on all crafts as children work on them.
Plan two craft times a day, but be prepared to skip one or both if the children need more rest time. Some of the crafts follow the “big kids” craft time but are simplified for this level. Some are designed only for the little ones, such as Session 2 ideas below that are about the animal pals. Toddlers will love these animal pal crafts!
Decide who will be in charge of preparing the craft materials (craft leaders, toddler teachers, or someone else). Whatever ideas you choose, have fun with them and use them to reinforce the big themes of the week.
Thematic Craft Ideas
Day 1
Session 1—Traveler’s Suitcase
Gather the following supplies for each child: a file folder (colorful ones are fun!), travel stickers, and glue stick or tape. You also need colorful card stock (for the suitcase handles and straps) and washable markers. Optionally, you may want magazines and scissors. (See below.)
Ahead of time, cut a handle for each file folder from the card stock, along with two card stock straps to place vertically on the suitcase. Attach them. If you are going to use items from the magazines for the toddlers to glue into their suitcases, cut them out (food, clothes, shoes, etc.—items you would take on a trip).
During class, toddlers color and sticker their “suitcases.”
Teaching Tie-In
What would you pack in your suitcase for a trip? Take responses. We’ve got God’s big, wonderful world to explore at VBS this week, filled with a world of special people!
Session 2—Sneaky Serpent
Gather the following supplies for each child: one large white paper plate, crayons or markers, two paper snake eyes or wiggle eyes, and a glue stick or glue dots.
Ahead of time, cut straight through the plate through the outer rim and continue cutting as you follow the inside edge of the rim all the way around the plate until the rim is cut from the plate in one long piece. Cut one end of the rim in the general shape of a snake’s head. Cut the other end to a point for the snake’s tail.
During class, the toddlers color the snake and add either paper or wiggle eyes.
Teaching Tie-In
Look at our sneaky snake. Do you remember what our snake animal pal’s name is? Take responses. Yes, it’s Bo! Bo reminds us of that sneaky serpent who tempted Adam and Eve to sin in the Garden of Eden. Do you remember what Adam and Eve did? Take responses. Do you know what sin is? Take responses.
Day 2
Session 1—Tall Tower
Gather the following supplies for each child: a Tall Tower sheet (download pattern below and print on light blue card stock), brown strips (details to follow), a strip of sand paper, two cotton balls, a glue stick, and (optional) an envelope. For the brown strips, use either brown construction paper or brown fun foam (preferred). Each child needs five brown pieces that are the same graduated lengths as the steps on the Tall Tower sheet.
Ahead of time, cut the brown strips, along with the sand paper strips.
During class, toddlers glue on the sand paper base at the bottom of the page and the cotton ball “clouds” at the top of the page. They can then either glue on the brown strips in the right spots, or just keep it like a puzzle to play with over and over. If doing that, provide envelopes to put the five brown strips in and attach to the back of the light blue card stock sheet.
Teaching Tie-In
Today, we talked about (will talk about) a tall tower that was built long ago. Does anybody know what we call that tower? Take responses. Yes, the tower of Babel. Does anybody know what happened there? Take responses, and share a brief overview of it.
Session 2—Camel-oculars
Gather the following for each child: one paper towel tube, 30-in. piece of colored yarn, two paper clips, two-sided camel pattern (download below), two 7-mm wiggle eyes and (optional) camel stickers. You also need scissors, crayons, markers, glue sticks, craft glue, colored masking tape, and a 1/4-in. hole punch.
Ahead of time, cut the paper towel tubes in half, cut the yarn into 30-in. pieces, and prepare the camel pattern by photocopying it onto white card stock, then cutting it out, making sure to NOT cut along the base line that would separate the two pieces that mirror each other. Also, decorate the two ends of each tube piece with colored masking tape and fasten the two tubes together temporarily with a paper clip at each end.
During class, kids color the camel pattern and glue on the wiggle eyes. If you have camel stickers, they put those on the paper towel tubes. Have them glue stick the inside of the camel and fold the sides together. (Or leaders may want to do the folding.) Leaders can attach the camel by squeezing a bead of craft glue into the channel between the tube pieces and then pressing the camel into place. Add a strap by punching a hole on each side about 1/2 in. from the end of the camel-oculars and tying on a piece of yarn.
Teaching Tie-In
Hey, what animal does that look like on your binoculars? Take responses. Yes, a camel, like Jamal our animal pal. Jamal is an Arabian camel who lives in the area near where the tower of Babel was built. The tower of Babel was a real place, and what happened there made a huge difference for all of us. Now we speak different languages and live in different places and even look somewhat different, all because of what happened at the tower of Babel!
Day 3
Session 1—Kids Around the World Puppets
Gather the following supplies for each child: a copy of the Kids Around the World pattern (download below), crayons in various shades of brown, plus other colors as well, one paper towel tube, and tape (or glue sticks, or glue dots). You’ll also need a paper cutter for ahead of time prep.
Ahead of time, photocopy and cut out the patterns. Using an office paper cutter, cut paper towel tubes into 3/4-inch sections, 5 per child.
During class, kids color their people to have different skin shades and looks, then attach them to the cut-down paper towel tubes with tape or other adhesive.
Teaching Tie-In
Point to your lightest paper person. Do so. Point to your darkest paper person. Do so. Isn’t it fun how God made every person have his or her own special look? I love that! Do you have any friends who have a different skin shade than you or who live in another country? Take responses. We have this whole big wide world of people to love and enjoy!
Session 2—Pup Mask
Gather the following for each child: a white paper plate, a glue stick, crayons or washable markers, a large craft stick, tape, and an Pup Mask Pattern (download below).
Ahead of time, photocopy and cut out the Pup Mask Pattern. Cut out the coordinating spots on the paper plates where the eye holes should be.
During class, have the kids line up the eye holes in the pattern with the eye holes in the plate. Glue the pattern to the plate and color. When completed, tape the large craft stick to the back.
Teaching Tie-In
Look at these cool masks! They remind me of our Pup Patrol! What kind of animals are pups? Take responses. Right, they’re dogs! There are many different types of dogs and they may look different from each other, but they’re still dogs. People may look a little different from each other, like having different shades of skin color, but they’re still people. Each person is a special masterpiece made by God in his image.
Day 4
Session 1—Mosaic Cross
Materials
- Compact discs, 1 per child
- Black card stock, 1 sheet for every 2 children
- Medium shade blue card stock, approx. 1 sheet for every 11 children
- Lighter shade blue card stock, approx. 1 sheet for every 11 children
- Medium shade green card stock, approx. 1 sheet for every 14 children
- Lighter shade green card stock, approx. 1 sheet for every 14 children
- Cross Pattern
- White card stock, 1 sheet for every 4 children
- Optional: Mod Podge®
Tools and Basic Supplies
- Office paper cutter
- Pencil
- Scissors
- Glue sticks
- 1-in. foam brushes (for Mod Podge®)
- Zippered baggies
Pre-prep
- Use a paper cutter to cut black card stock into 5 1/2 x 5 1/2 in. squares, one per child.
- Use a pencil to trace a compact disc in the center of each black square.
- Use a paper cutter to cut all the blue and green card stock into 1-in. squares.
- Photocopy the Cross Pattern onto white card stock. Then cut out a cross for each child.
- Place a compact disc (CD), a 5 1/2 x 5 1/2 in. black square, a cross, along with 8 medium blue squares, 8 lighter blue squares, 6 medium green squares, and 6 lighter green squares into a zippered baggie for each child.
Teaching Tie-In
Show the sample craft and say:
What shape is on our craft today? Take responses. Yes, it’s a cross. What does the cross mean to us? Take responses. Yes, Jesus died on the cross and rose again to take the punishment for our sins. That’s good news! And we have a background that looks kind of like the land and the water of the world to remind us that he came for every nation and tribe and people! The Father (God) has sent his Son (Jesus) to be the Savior of the world for all those who believe!
Let’s make our cross to remind us of that great news.
Class Time Directions
- Place your black square in front of you, blank side up (no circle). Then apply glue stick to the bottom half of the square.
- Begin placing colored squares side-by-side (ideally NOT touching) in a line along the bottom. For the most part, keep the blues together and the greens together as you build your mosaic. It is supposed to represent the world so there will be more blue (water) than green (land) when you’re finished. You may want to have a green area in the middle surrounded by blue, or green areas in opposite corners with blue in between. It’s up to you.
- When you’ve finished a couple rows, add more glue stick to the black area, and keep going.
- Now flip your mosaic over and use scissors to cut out the marked circle.
- Glue stick the back of the white cross, then center it on the mosaic and press into place.
- Finally, add plenty of glue stick to the compact disc (CD), then press the mosaic circle onto the CD.
- Optional: Adults can use a foam brush to seal each child’s mosaic with Mod Podge®. Allow time to dry.
Tip Corner
- Instead of making individual kits with the exact amount of needed squares in them, you may want to just place a bunch of each color in the middle of the table.
- To display your mosaic, add adhesive magnets or an adhesive picture hanger to the back.
Session 2—Swimming Swan
Gather the following: blue card stock or construction paper (one piece per child), white washable paint, one or more paper plates to put the paint on, black and orange permanent markers, 1 heart sticker or fun foam heart per child, 1 cotton swab per child, and wet wipes for cleanup.
Ahead of time, pour some paint onto the plate.
During class, each child will dip his hand into the paint and then press his hand down on the blue paper to make the body of the first swan. It helps to orient the paper vertically so the child doesn’t have to bend his hand. Repeat with the other hand to make another swan. Wipe their hands with a wet wipe to clean.
Using a cotton swab, add a little white paint for the necks of the swans. They may want to daub a couple white clouds in the sky as well. After the paint has dried, the kids can use the markers to add a black eye and an orange beak to each swan. Put the heart sticker near the swans.
Teaching Tie-In
Look at our swans here. Does anyone remember their names? Take responses. Their names are Agape and Phileo, which means “love” in another language. What shape in our picture has something to do with love? Take responses. God loved us so much he sent his Son to save us.
Day 5
Session 1—Heart Headband
Gather the following supplies for each child: a page of 8 hearts (photocopy and cut out ahead of time—download below), a corrugated cardboard bulletin board border strip approximately 18 inches long, 4 pipe cleaners, and washable markers. You will also need tape.
Ahead of time, cut out the 8 hearts and cut the 4 pipe cleaners in half. Cut the bulletin border strip into 18-inch pieces.
During class, the toddlers color the hearts and tape them on the pipe cleaners (with help). Stick the pipe cleaners in the corrugated cardboard border strip. Leaders fit the headbands to their heads and tape.
Teaching Tie-In
Look at our cute heart headbands! What do hearts remind you of? Take responses. God loves us so much, and we ought to love others, too. How can we show others we love them? Take responses.
Session 2—Runnin’ “Tail” (Run and Tell)
Gather the following supplies: light brown sentence strips or bulletin border, 1 piece per child that will fit around the child’s waist, crayons, tape or glue dots for each child, and the brown tail feathers Pattern (download below).
Ahead of time, photocopy the brown tail feathers pattern and cut out one set of feathers per child.
During class, have the kids tape or glue on the feathers and color both the sentence strip and feathers as desired.
Teaching Tie-In
Does anybody remember the name of our animal pal today? Take responses. Yes, it’s Racer. Racer is a kind of bird called a roadrunner because he runs all over the place. God wants us to run around and tell people about Jesus and his love!
 Download PDF
 Download PDF
Incredible Race World Class Science & Crafts (Excerpt)
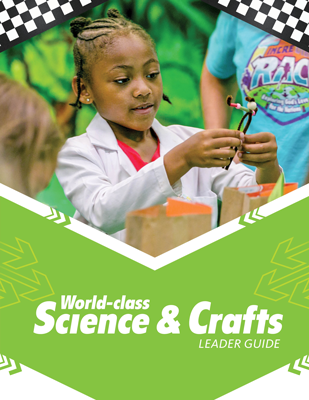
Kids love science experiments and crafts! This guide contains everything you need to coordinate the daily science experiments and crafts for all age groups.
Browse Kids Book- © 2024 Answers in Genesis
- Privacy Policy
- Contact
- About