
Kids Mode
This will turn off kids mode. Are you age 13 or older?
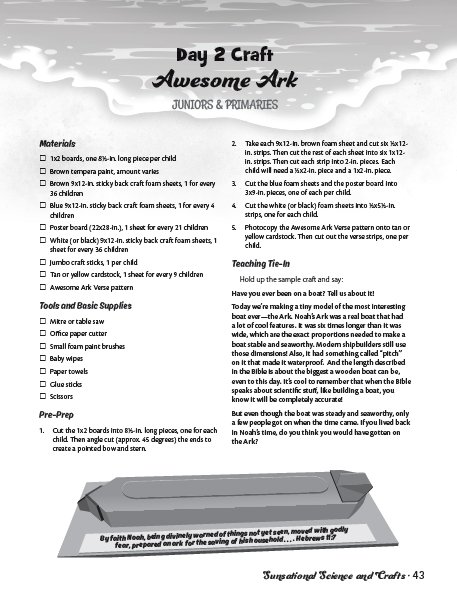
Awesome Ark
on May 20, 2016Materials
- 1x2 boards, one 8½-in. long piece per child
- Brown tempera paint, amount varies
- Brown 9x12-in. sticky back craft foam sheets, 1 for every 36 children
- Blue 9x12-in. sticky back craft foam sheets, 1 for every 4 children
- Poster board (22x28-in.), 1 sheet for every 21 children
- White (or black) 9x12-in. sticky back craft foam sheets, 1 sheet for every 36 children
- Jumbo craft sticks, 1 per child
- Tan or yellow cardstock, 1 sheet for every 9 children
- Awesome Ark Verse pattern
Tools and Basic Supplies
- Mitre or table saw
- Office paper cutter
- Small foam paint brushes
- Baby wipes
- Paper towels
- Glue sticks
- Scissors

Pre-Prep
- Cut the 1x2 boards into 8½-in. long pieces, one for each child. Then angle cut (approx. 45 degrees) the ends to create a pointed bow and stern.
- Take each 9x12-in. brown foam sheet and cut six 1/2x12- in. strips. Then cut the rest of each sheet into six 1x12- in. strips. Then cut each strip into 2-in. pieces. Each child will need a 1/2x2-in. piece and a 1x2-in. piece.
- Cut the blue foam sheets and the poster board into 3x9-in. pieces, one of each per child.
- Cut the white (or black) foam sheets into ½x5½-in. strips, one for each child.
- Photocopy the Awesome Ark Verse pattern onto tan or yellow cardstock. Then cut out the verse strips, one per child.
Teaching Tie-In
Hold up the sample craft and say:
Have you ever been on a boat? Tell us about it!
Today we’re making a tiny model of the most interesting boat ever—the Ark. Noah’s Ark was a real boat that had a lot of cool features. It was six times longer than it was wide, which are the exact proportions needed to make a boat stable and seaworthy. Modern shipbuilders still use those dimensions! Also, it had something called “pitch” on it that made it waterproof. And the length described in the Bible is about the biggest a wooden boat can be, even to this day. It’s cool to remember that when the Bible speaks about scientific stuff, like building a boat, you know it will be completely accurate!
But even though the boat was steady and seaworthy, only a few people got on when the time came. If you lived back in Noah’s time, do you think you would have gotten on the Ark?
Class Time Directions
- Take a 1/2-in. strip and remove the paper backing. Then take one end of the wood piece (boat) and place both ends of the strip about halfway in from the point (half an inch on either side) and press into place. Squeeze the excess together to form a fixed rudder that juts out from the back of the boat. To finish the rudder, snip off the top corner with scissors. Such extensions were common on the earliest large ships of the Mediterranean.
- Take a 1-in. strip and remove the paper backing. Then, at the front of the boat, but directly over (on top of) the point this time, take the strip and carefully place the ends near the edge of each side of the boat. Because of the point, two corners of the strip will hang over. Then press down, while pinching the excess in the middle together, to form a fin on the top of the boat. To finish the fin, cut off (or fold down) the overhanging corners with scissors. Such fins or stems were a hallmark of ancient ships. They would catch the wind and keep the boat perpendicular to the waves.
- Take the long white (or black) strip and remove the paper backing. Then center and press it onto the top of the piece of wood (boat).
- Paint the entire boat (except the foam pieces). Dip your brush lightly into the paint and spread evenly, using long, even strokes. Don't apply too much paint, or it will take too long to dry. Just enough to cover.
- Paint the top and sides only of the jumbo craft stick. Leave the underside unpainted and dry.
- Glue stick the jumbo craft stick, painted side up, to the top of the long white (or black) foam strip.
- Use baby wipes and paper towels to clean paint off hands.
- For the Ark base, take the large blue piece of craft foam and remove the paper backing. Then carefully press it onto the piece of poster board so the edges line up perfectly.
- With the blue foam base before you in a horizontal fashion, attach the Bible verse strip near the edge closest to you with glue stick.
- When dry, place the Ark on the blue base for display!
Tip Corner
- You can make simple kids' paint brushes by wrapping a piece of sponge around the end of a craft stick and securing it with a rubber band.
- For those arks that are still too wet (because of too much paint), send them home in plastic baggies, or keep them till tomorrow and then send home. Make sure names are on them!
 Download PDF
- © 2024 Answers in Genesis
- Privacy Policy
- Contact
- About