
Kids Mode
This will turn off kids mode. Are you age 13 or older?
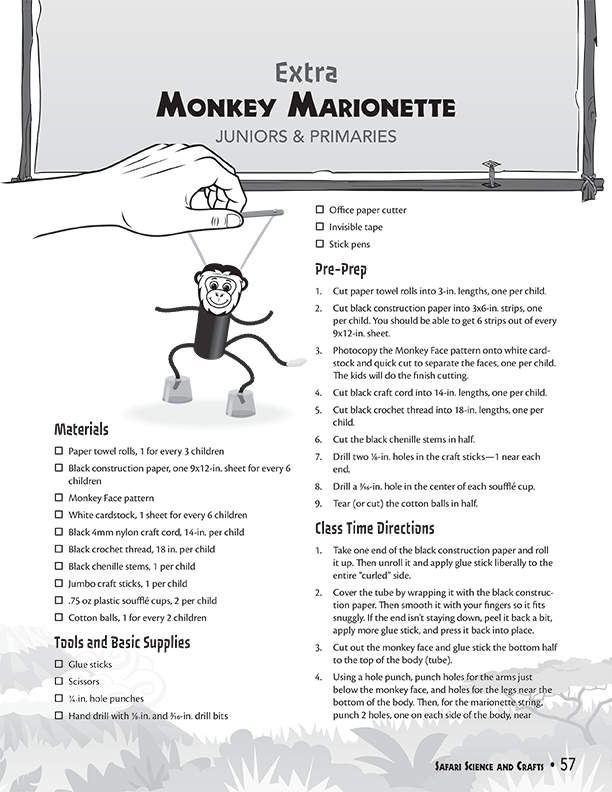
Monkey Marionette
on September 21, 2015Materials
- Paper towel rolls, 1 for every 3 children
- Black construction paper, one 9x12-in. sheet for every 6 children
- Monkey Face pattern (see below)
- White cardstock, 1 sheet for every 6 children
- Black 4mm nylon craft cord, 14-in. per child
- Black crochet thread, 18 in. per child
- Black chenille stems, 1 per child
- Jumbo craft sticks, 1 per child
- .75 oz plastic soufflé cups, 2 per child
- Cotton balls, 1 for every 2 children
Tools and Basic Supplies
- Glue sticks
- Scissors
- 1/4-in. hole punches
- Hand drill with 1/8-in. and 3/16-in. drill bits
- Office paper cutter
- Invisible tape
- Stick pens
Pre-Prep
- Cut paper towel rolls into 3-in. lengths, one per child.
- Cut black construction paper into 3x6-in. strips, one per child. You should be able to get 6 strips out of every 9x12-in. sheet.
- Photocopy the Monkey Face pattern onto white cardstock and quick cut to separate the faces, one per child. The kids will do the finish cutting.
- Cut black craft cord into 14-in. lengths, one per child.
- Cut black crochet thread into 18-in. lengths, one per child.
- Cut the black chenille stems in half.
- Drill two 1/8-in. holes in the craft sticks—1 near each end.
- Drill a 3/16-in. hole in the center of each soufflé cup.
- Tear (or cut) the cotton balls in half.
Class Time Directions
- Take one end of the black construction paper and roll it up. Then unroll it and apply glue stick liberally to the entire “curled” side.
- Cover the tube by wrapping it with the black construction paper. Then smooth it with your fingers so it fits snuggly. If the end isn’t staying down, peel it back a bit, apply more glue stick, and press it back into place.
- Cut out the monkey face and glue stick the bottom half to the top of the body (tube).
- Using a hole punch, punch holes for the arms just below the monkey face, and holes for the legs near the bottom of the body. Then, for the marionette string, punch 2 holes, one on each side of the body, near the top, behind the monkey face. Finally, punch one more hole for the tail on the back of the body near the bottom.
- Take the black cord and tie a knot at one of the ends. Then push the other end through an upside-down soufflé cup, in one of the leg holes, out the other leg hole, and through the top of the other upside-down soufflé cup. Then, finish by tying a knot in the end, and then “evening out” the length of the legs, if necessary.
- Take one of the black chenille stem pieces and push it in through one of the arm holes and out through the other arm hole. Then “even out” the arms and bend the ends slightly for hands.
- Pass the piece of black thread through the 2 holes behind the monkey head. Then feed the ends through the 2 holes in the craft stick and tie together.
- For the monkey tail, take half of a cotton ball and gently pull on it to thin it out. Then apply glue stick to one end of the remaining black chenille stem piece and wrap with the cotton. Then stick the other end of the chenille stem into the tail hole, bend it up, and tape it to the inside of the tube with invisible tape.
Tip Corner
- You can drill several craft sticks at a time by tightly bundling them together with rubber bands. Some may break because of the direction of the wood grain, so have extras on hand.
- For easier threading and to prevent fraying, consider fusing the ends of the black nylon cord with a candle or candle lighter during Pre-Prep.
 Download PDF
- © 2024 Answers in Genesis
- Privacy Policy
- Contact
- About