
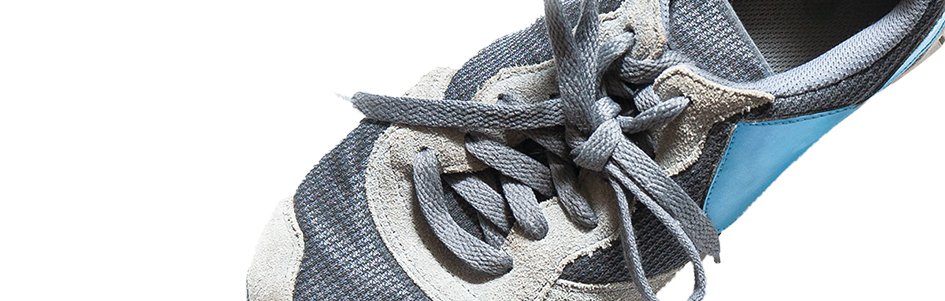
Footwear Impressions
Experiment
From Unlocking Science with Roger Patterson
God made all people different in the way they walk, in their stride, and in their steps. If you walk bowlegged, with your toes out or in, or if you drag your heels, you leave behind different footprints.
Footwear impressions have the potential to leave individual characteristics under the right conditions, making them a valuable tool in forensic investigation. Investigators recognize two types of characteristics in these footwear impressions: class and individual. Class characteristics are group characteristics such as shoe brand, size, design, or color. Individual characteristics are wear marks, cuts, gouges, and damage to the sole of the shoe.
Watch ,Unlocking Science on Answers TV for a demonstration of this experiment.
Individual characteristics in shoes are unique to the individual who wore the shoe. There is only a one in an octillion (1,000,000,000,000,000,000,000,000, 000 or 1 x 1027) chance that two different people wearing the same shoe would have the exact same individual characteristics. That is basically a 0% chance.
In addition to being valuable for helping investigators solve crimes, our unique foot impressions remind us of our individual value to God. If the Creator cared enough to make our footsteps physically unique, imagine how he delights in directing our steps (Proverbs 3:6).
Investigate your own unique foot impressions and compare them with the foot impressions of other people.
Materials Needed
- 1 lb. plaster of paris per impression*
- 1 gallon plastic zipper bag per impression
- 2 cups (about 500 ml) water per impression
- Aerosol hairspray
- Craft sticks
- Paintbrush
- Scrub brush, old toothbrush, or sponge
- If indoors, a plastic shoebox or cardboard shoebox that your foot (with shoe on) can step inside.
- Sand/Soil: damp play sand, damp beach sand, or soft clay/dirt mix are preferred. (Potting soil contains too much debris to make good prints.)
*Do not immerse any body parts (hands or feet) in the mixed plaster as it can cause severe burning.
Procedure
- If outside, clear any debris from a patch of ground, leaving only the soil. If inside, fill your shoebox about 1/3 full of soil and remove any debris like sticks, large rocks, or leaves.
- Select one of your shoes with an interesting tread pattern on the bottom. Step (or walk through) the soil. Observe your shoe print. Is it clear and complete? If not, clear the area and follow the procedure until you have a satisfactory impression.
- Add plaster of paris (1 lb.) to a strong plastic zipper bag (1 gallon). The bag needs to be large enough to add sufficient water when you’re ready to cast the impression.
- Hold the hairspray can approximately one foot way from the impression and lightly spray the impression in a sideto- side motion. The hairspray will help hold the soil particles together while you are pouring the casting material.
- Add the water (about 500 mL) to the zipper bag and seal it. Knead the bag until there are no more lumps. Work quickly because the plaster of paris will begin to set.
- Open one corner of the bag. Start approximately 1 inch above one end of the impression and slowly pour the casting material just above the impression. To avoid damaging the details of the print, do not pour the casting material directly onto the impression, but let it flow into the impression. You should cover the entire impression as well as about a half- to one-inch overlap onto the soil around the perimeter. Discard the zipper bag and do not wash the plaster of paris down your drain.
- Break pieces of craft sticks into 2–3-inch pieces and place them on the impression in all different directions to give it strength. Do not press the craft sticks so deep that you damage the impression.
- If outside, the plaster will need to cure (set) for a minimum of 30 minutes. After 30 minutes, if the plaster is hard to the touch, carefully pick up the impression, turn it over, and place on a flat surface for 24 hours. Do not clean the impression at this point because further hardening needs to take place. If you are inside, simply leave the impression in the shoebox for 24 hours.
- After 24 hours, use a small paintbrush to clean your impression by removing any excess soil.
- Wash the impression with an old toothbrush or sponge to remove remaining soil. Don’t rub too much or you will remove the details.
Comparing the Print
Compare the shoe you wore to create the impression and your lifted impression side by side. Find five class characteristics and five individual characteristics (mentioned in the introduction). Can you associate any of the unique wear marks, tears, or gouges in the bottom of your shoes with certain activities that you have participated in?
Family Fun
Compare your gait to the gait of others by walking through a section of soil that will allow you to leave 3–4 prints. Examine the prints and record as many details as you can. Notice stride length (toe to heel), toe direction, whether the print is deeper on the inside or outside, and any other features you can identify.
, affectionately known as
Mr. P, helps kids understand science from
a biblical perspective through experiments
and hands-on activities in his Answers TV
show Unlocking Science.
Answers Magazine
October–December 2021
Curious about creation but don’t know where to start? Let’s begin with the basics.
Browse Issue Subscribe
Support the creation/gospel message by donating or getting involved!

Answers in Genesis is an apologetics ministry, dedicated to helping Christians defend their faith and proclaim the good news of Jesus Christ.
- Customer Service 800.778.3390
- © 2024 Answers in Genesis