
Experiment: Weathering a Storm
From Unlocking Science with Roger Patterson
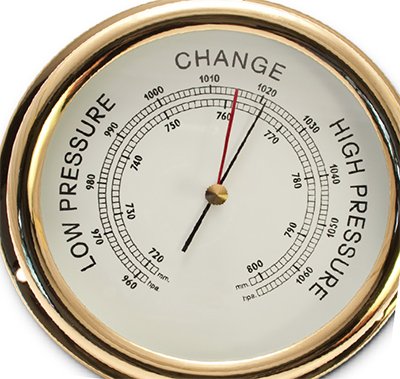
Barometers are tools used to measure air pressure, also called barometric pressure. We use them to predict weather based on rising or falling pressure. Rising pressure generally indicates that warm, calm conditions are ahead. Falling pressure generally indicates that cooler, stormy conditions are in the future.
Though some weather events (such as hurricanes, blizzards, and tornadoes) result from conditions on a fallen earth, Scripture is clear that God is in control. Genesis 8:22 says, “While the earth remains, seedtime and harvest, cold and heat, summer and winter, day and night, shall not cease.” Though we cannot know for sure what the weather will be from day to day, we can make educated predictions based on science.
There are two types of science: historical and observational. Historical science relies on interpretating evidence from past events with a philosophical point of view. Historical science is not observable, testable, or repeatable. On the other hand, observational science uses direct observation, the five senses, and the scientific method to explain a set of facts. Observational science is testable and repeatable.
We can use observational science to measure temperature, atmospheric pressure, and weather conditions on any certain day. A weather log is an example of using observational science. We can test, repeat, and record the data in a lab experiment. However, when meteorologists predict the weather for the following day or week, they are using historical science. Because they cannot directly observe what the conditions will be like, they base their predictions on past weather statistics, models, and data. The same goes for weather in the distant past. We can’t be certain unless we have records. We know there was a lot of rain and stormy weather about 4,300 years ago during the global flood described in Genesis 6–9. But how you interpret the past will depend largely on whether or not you believe God’s Word.
In this experiment, you can study the weather by building your own barometer.
Materials Needed
- 1 wide mouth pint glass jar or wide mouth glass/plastic container with rigid sides
- 4x6-inch cardstock
- Clear packing tape/transparent tape
- Scissors
- Ruler
- 1 large balloon
- Fine-tipped permanent marker
- Glue
- 1 wood skewer/toothpick/craft stick
- 1 rubber band
- Paper or notebook
Construction
- Cut off most of the neck end of the balloon and stretch the balloon tightly over the mouth of the glass jar. Make sure that the surface of the balloon is as flat as possible.
- Secure the balloon to the jar with the rubber band. It should resemble a drum. Since neither the glass jar nor balloon allows air or water to pass through, the air pressure inside the jar will remain constant.
- Cut the wood skewer to match the diameter of the mouth of the jar, leaving the pointy end intact. Use the marker to color the tip of the skewer for more contrast when reading the measurements.
- Using a tiny drop of glue at the cut end of the skewer, fasten the skewer to the top of the balloon-covered jar as close to the center as possible. The pointed end of the skewer should stick off the edge of the jar. You now have a pointer to measure changes in air pressure.
- Fold the cardstock along the long edge to create a flap to attach to the jar. Using the clear tape, fasten the folded piece of cardstock by taping the flap to the jar, allowing the cardstock to stand vertical next to the jar close to, but not touching, the pointer.
- Record the height of the pointer by placing a small mark on the cardstock directly next to the skewer. Get down at eye-level to make sure your mark is even with the pointer. This is your starting pressure. In your notebook, record the barometric pressure at the time you made your barometer.
- Place your barometer in a spot that will not receive direct sunlight or have temperature extremes.
Reading the Barometer Scale
As the air pressure changes outside the barometer, you will observe changes in the height of the pointer relative to the starting pressure inside the jar. For example, when the air pressure is high, the air outside the barometer will be exerting more pressure than the air inside the barometer. You may observe the balloon to be curved down into the glass jar, which will push the pointer above your starting point. The opposite effect will occur when there is low pressure. You may observe the balloon stretching upward, causing the pointer to be below your starting point on the chart.
Comparing the Data
- Compare the daily atmospheric pressure from the National Weather Service to readings from your homemade barometer. Did your homemade barometer accurately measure whether the atmospheric pressure was high or low?
- Watch the weather report/forecast on the local news. What terminology and concepts about weather did you recognize? How accurate were the predictions for the following day and week?
Did You Know . . .
Evangelista Torricelli, a pupil of Galileo, invented the first barometer in 1643.
When it was first invented, the barometer was a symbol of wealth and was used mostly as decoration in wealthy homes.
, affectionately known as
Mr. P, helps kids understand science from
a biblical perspective through experiments
and hands-on activities in his Answers TV
show Unlocking Science.
Answers Magazine
January–March 2022
God created the world to be inhabited, right down to the frozen continent at the bottom of the globe.
Browse Issue Subscribe


Support the creation/gospel message by donating or getting involved!

Answers in Genesis is an apologetics ministry, dedicated to helping Christians defend their faith and proclaim the good news of Jesus Christ.
- Customer Service 800.778.3390
- © 2024 Answers in Genesis